Wind Bell Craft
2-4-2016 -- This was an art project that Lauren did in Brightly Beaming Resources' (Step 2: Letter of the Week) homeschool curriculum for the "w" sound as in "wind". She is going to make a "wind chime" and we used this present that she got last christmas from her aunt, this "Season's Windbell Summer" craft toy set as her "wind chime" art project.
There are a variety of wind bell or wind chime craft toy sets for kids aside from what we use here, if you can't find any in the stores near you, you can try and buy from online in stores such as eBay & LazadaPH.
SHOP FOR WIND BELL OR WIND CHIME CRAFT TOYS ONLINE (Affiliate): Put your mouse over the photo of the product below, click on any side of the photo avoiding the pinterest logo to visit the eBay and LazadaPH page with a variety of each specified product to choose from.
|
|
===========================================================
Read this blog's "DISCLOSURE POLICY" here.
===========================================================
Read this blog's "DISCLOSURE POLICY" here.
===========================================================
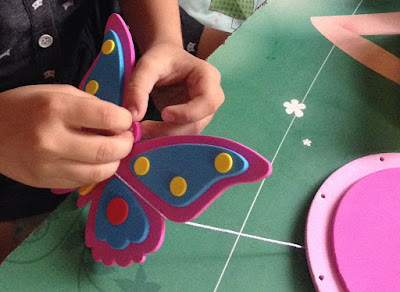
It's good to construct the pieces that are easier to do first and guide child with other complicated steps. Lauren stick the 2 round pink pieces together (as you can see in the picture above) to create the round base of the wind bell then she puts together the complete look of the large butterfly to be hang at the center of the wind bell (as seen in the picture below).
Next, Lauren inserted a thread in the middle of the round base sheet and into the top hole of the large butterfly to hang it.
Then she started inserting the threads on the sides of the round sheet so she can decorate them with beads, buttons, small flowers and butterflies one by one.
The instructions and the sample photo in the box uses double way of threading but to make it easy and simple for kids, Lauren used the single way of threading the beads and buttons instead as you can see in the picture above.
I assisted Lauren in tying the knots. I made a pattern in how to knot the threads and Lauren was the one who completed and pulled the knots together tightly. After all the pieces are put and tied together, here is the complete look of this "Wind Bell" craft set (as you can see in the photo below).
Overall, it's a nice and useful craft set to get for kids, I think kids of all ages can benefit from it in so many ways such as creativity, patience, fine motor skills, attention, etc. It's nice to be able to create your own wind bell especially as cute and colorful as this. I'm sure the kids will feel proud to hang a lovely and colorful wind bell or wind chime that they have made or help made themselves. The resulting wind bell really looks attractive and fun. It would make a lovely decoration in any room indoors and most especially outdoors afterwards.


Comments
Post a Comment