Insect Craft: Plastic Egg Tray Caterpillar
In this post, I will be sharing a "caterpillar" craft by reusing some egg trays in white plastic material. This was an art project that Lauren did in Brightly Beaming Resources' (Step 2: Letter of the Week) home school curriculum for the short "e" sound as in "egg", Click Here To Find Out Why We Are Doing Homeschooling.

Original Version 2015, Plastic Egg Tray Caterpillar
DISCLOSURE: This blog and post contains affiliate links. This means I may earn a commission should you chose to sign up for a program or make a purchase using my link. Thank you so much for your support!
Some of the materials used in completing this project were things I was able to find around our house at that time Lauren made the project, such as beads, buttons (from a broken old toy), strings & steel wire (which I put together as an alternative for fuzzy wire). You may try these alternatives if you have it at home and if you don't have the needed materials on hand or don't have enough time to buy them. The original caterpillars Lauren made as art project are the green caterpillars (as seen in the image above).
READY FOR KID BEFORE STARTING ACTIVITY ALONG WITH OTHER MATERIALS
* cut plastic egg tray
* cut paper accessories to decorate caterpillar body
DONE BY ADULT OR PARENT
* cut plastic egg tray
* cut paper accessories to decorate caterpillar body
DONE BY ADULT OR PARENT
NOTE: This craft is a collaboration between parent or caregiver and child and is suitable for kids about 6 and above, you may adapt the process to the skill or ability of the child.
* CATERPILLAR BODY: Take a 1-dozen plastic egg tray, cut in the middle to separate 2 rows of 6-piece egg holders. Trim edges of egg holders to make them even.
* CATERPILLAR BODY: Take a 1-dozen plastic egg tray, cut in the middle to separate 2 rows of 6-piece egg holders. Trim edges of egg holders to make them even.
* CATERPILLAR SPOTS: If you want to use paper as spots on the caterpillar body, take a small coin and trace on construction paper in any color of choice, you may allow the child to decide on what colors to use. Fold paper several times to create multiple sections in it then trace small coin on top and cut pattern to reveal many circles in one cutting. You can also use about 25mm round hole puncher for convenience to create these large spot details on caterpillar body. Punch smaller dots of paper using regular hole puncher to glue on top of big circle patterns or you may use sequins.
* paint egg container
* decorate caterpillar body
* glue caterpillar pieces | parts on egg container
STEPS IN DOING THIS CATERPILLAR CRAFT
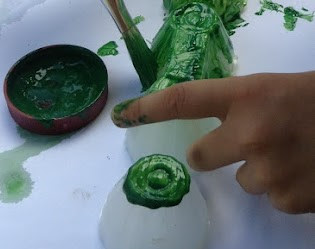
STEP #1: Caterpillars come in different colors, let child paint egg container with any color of choice. It is best to use acrylic paint for this as this is the type of paint that tends to stick better on this type of plastic material as compared to poster or tempera paint which tends to peel or wear off when they dry. Set aside painted egg container to dry under the heat of the sun or in front of an electric fan.
Check Out "Acrylic Paint" @ shopee.ph
STEP #2: Once egg container is dry, let child decorate any accessory of choice on top and side of egg container. You may use buttons or paper circles.
STEP #3: Next, cut the right length of fuzzy wire or pipe cleaner, put hot glue and assist child to glue fuzzy wires on the spot for the caterpillar antennas.
STEP #4: Next, let child glue googly eyes, you may get colorful with the eyes and try a variety of googly eye colors and types or you may use small beads as eyes of caterpillar. Add hot glue and assist child to glue googly eyes or beads on the spot. You may add a caterpillar nose or not. You can use a large bead as nose of caterpillar.
STEP #5: Finally, cut some short pieces of fuzzy wire or pipe cleaner, put tiny hot glue and assist child in gluing fuzzy wire on the spot to add a caterpillar mouth.
And there goes your colorful and fun looking plastic egg tray caterpillars! Get the kids creating with their own version of this caterpillar craft today!
MATERIALS FOR THIS CRAFT
* 1-dozen white plastic egg tray * paint brush * paint mixing tray * acrylic paints * small beads (as eyes if you don't have googly eyes) and big beads (as nose, optional) * large buttons (if not using paper as large spots on caterpillar body) * assorted construction papers * 25mm round hole puncher * regular hole puncher (optional) * sequins * scissors * googly eyes * solid glue stick * fuzzy wires * hot melt glue * glue gun
LEARNING IS MORE FUN WITH A STORY!
Click on the pictures below to check out these animated story videos about "Caterpillar" @ DAILYMOTION! These stories talk about the life of a caterpillar and its transformation into a beautiful butterfly.
Get "The Very Hungry Caterpillar" and more children's books @ thriftbooks.com
If you got any thoughts and questions regarding this craft, feel free to interact and write it down in the comment box below. I'd be happy to hear from you. Thank you so much for viewing and reading.
POST UPDATED: June 2019
A little support goes a long way! If you’d like to help us keep creating, you can do so at https://ko-fi.com/kreativone


Comments
Post a Comment