
Ocean Craft: Empty Plastic Bottle Oyster | Home Learning Art & Craft Activity
In this post, I will be sharing an "oyster" craft. This was a craft project that Lauren did in Brightly Beaming Resources' (Step 3: Sound of the Week) home school curriculum for the "oy" sound as in "oyster", Click Here To Find Out Why We Are Doing Homeschooling. We have lots of these empty plastic bottles at home and that gave me the idea to make this fun oyster craft using this material.

DISCLOSURE: This blog and post contains affiliate links. This means I may earn a commission should you chose to sign up for a program or make a purchase using my link. Thank you so much for your support!
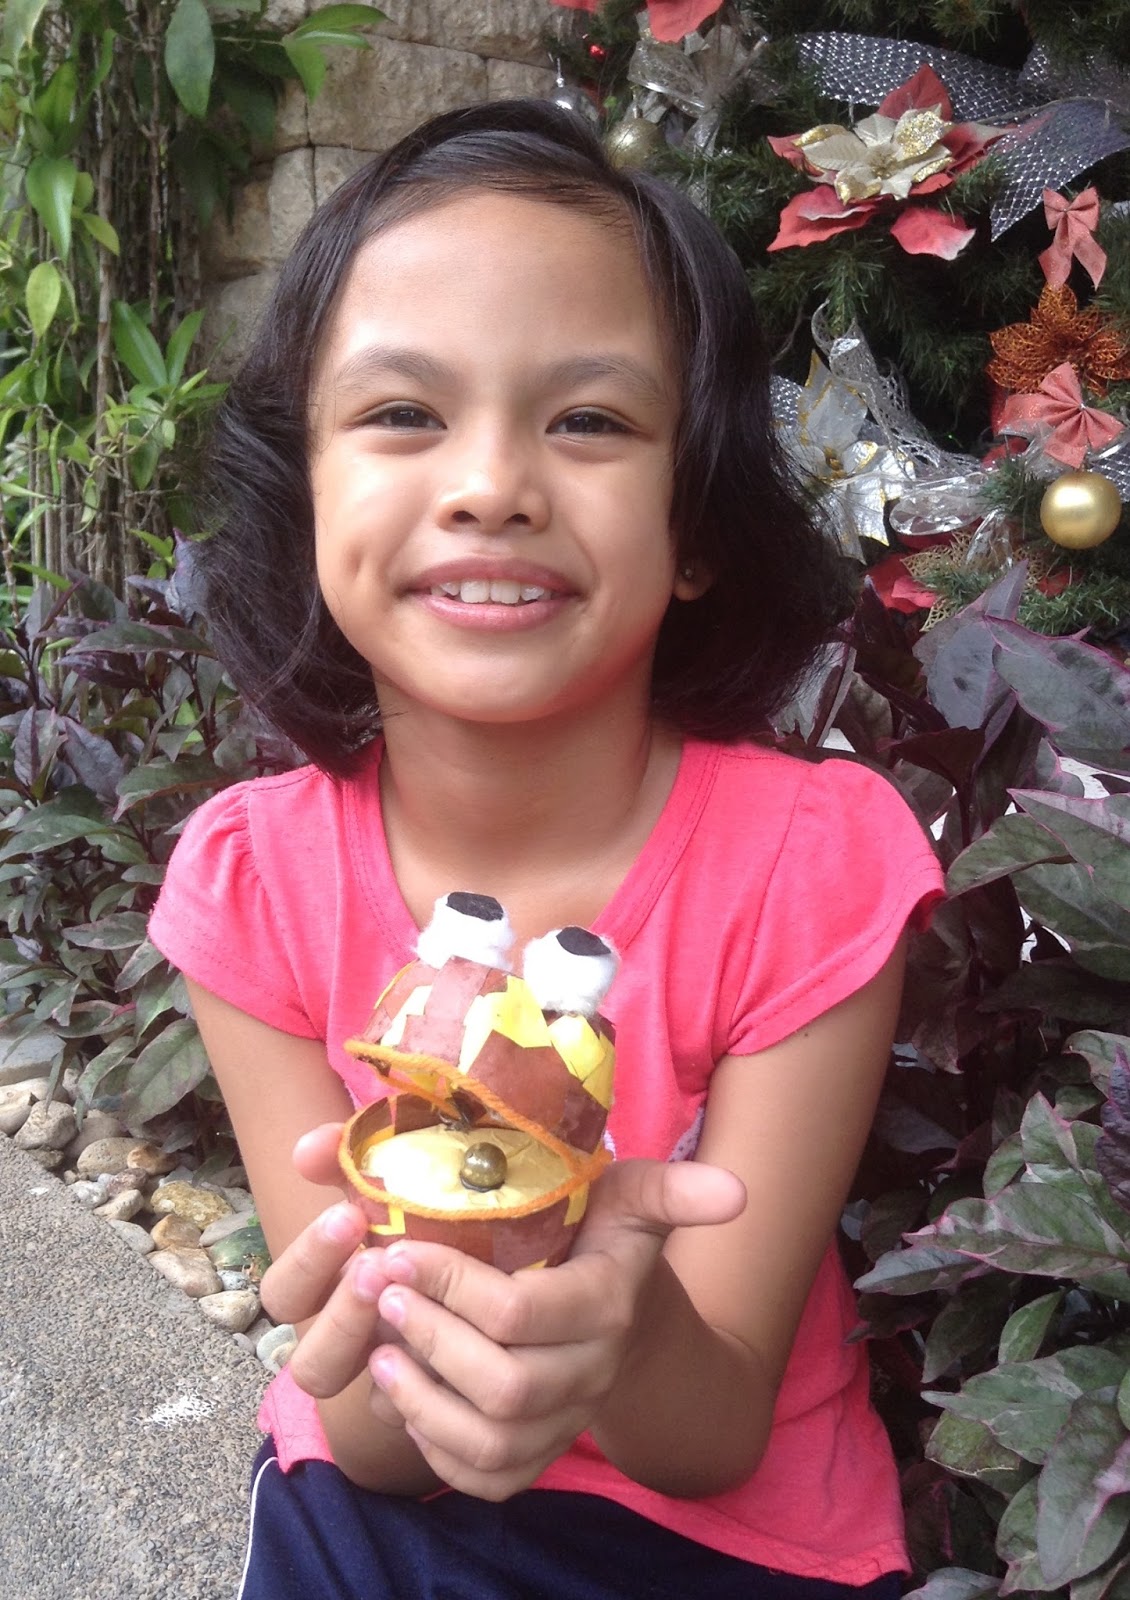
I took the bottom of 2 empty plastic bottles for the shells of our oyster, the bottles are covered with strips of different colors of construction papers, a crumpled paper is glued in the bottom shell as oyster meat and a large bead is glued on it for its pearl.
READY FOR KID BEFORE STARTING ACTIVITY ALONG WITH OTHER MATERIALS
* cut empty plastic bottles
* cut strips of construction paper to cover plastic bottle
* cut eyeball patterns
* cut strips of paper to crumple into a ball
DONE BY ADULT OR PARENT
NOTE: This craft is a collaboration between parent or caregiver and child and is suitable for kids about 6 or 7 and above, you may adapt the process to the skill or ability of the child.
* OYSTER SHELL: Take 2 small (300 ml) sized empty plastic bottles. Make a hole in the middle of both bottles using a knife, continue cutting the whole plastic using a large scissor. Take the bottom part of these 2 plastic bottles which will be used as the upper and bottom shell of the oyster. Cut the 2 bottom parts of the bottle with a depth just enough as shells for the oyster. Since we cannot easily paint this kind of plastic material, the plastic will be covered by gluing pieces of different colors of construction papers all over it.
* OYSTER COVERING: Take different colors of construction papers in any colors of choice. You can use about 2 to 3 colors, draw thin vertical lines on the papers using a ruler then also make some thin horizontal lines over the vertical lines to create small boxes. Cut to reveal small pieces of square papers to be glued all over the bottle.
* OYSTER EYEBALLS: Take a black construction paper trace a small coin on it to create eyeball patterns. Set aside for later use.
* OYSTER MEAT CENTERPIECE: Take a construction paper in any color of choice. Fold about 2 or 3 whole construction papers into 1/8 size and cut to create the strips of paper to be crumpled into a small ball.
DONE BY CHILD
* glue strips of paper all over plastic bottle
* crumple papers to create ball for centerpiece of oyster
* glue pieces of oysters together
STEPS IN DOING THIS OYSTER CRAFT
STEP #1: Let child glue the strips of construction papers alternately in different colors all over the plastic bottles to cover them up using liquid glue.

STEP #2: Next, measure the entire detail of the top of each oyster shell with a yarn then cut the strand of yarn. Let child glue the yarns around the top or mouth of each oyster shell.

STEP #3: Next, let child crumple the strips of construction papers that was cut earlier into a small ball just enough as centerpiece of the oyster. Put liquid glue all over the insides of the bottle that will be used as the bottom shell of the oyster. Let child spread the glue and put the ball of crumpled paper in it.

STEP #4: Next, let child glue a bead in the middle of the crumpled paper as pearl of the oyster using hot glue. Put hot glue on the spot and direct child to glue the bead on it. You can use any color of large bead you have.

STEP #5: Next, let child glue the upper shell on the inner middle tip part of the bottom shell using hot glue (with supervision).

STEP #6: Next, let child glue the eyeball patterns on top of 2 cotton balls then let child glue the two cotton balls on top of upper oyster shell.

And there goes your "EMPTY PLASTIC BOTTLE OYSTER". You may use any color combinations in coming up with your oyster aside from what is shown. Get the kids creating their own version of this fun looking oyster craft today!
MATERIALS FOR THIS CRAFT
* 2 small (300 ml) empty plastic bottles * assorted construction papers * cotton balls * ruler * pencil * scissors * liquid glue * yarns * large bead * hot melt glue * glue gun
LEARNING IS MORE FUN WITH A STORY!
Below is a story about getting something beautiful out of experiencing something bad. Watch & listen to this read aloud story of the book "Pearlie Oyster: A Tale of An Amazing Oyster" by Suzanne Tate.
Get "Pearlie Oyster" and more children's books @ thriftbooks.com
I'D LOVE TO HEAR FROM YOU
If you got any thoughts and questions regarding this craft or topic, feel free to interact and write it down in the comment box below. I'd be happy to hear from you. Thank you so much for viewing and reading.
POST UPDATED: June 2023
A little support goes a long way! If you’d like to help us keep creating, you can do so at https://ko-fi.com/kreativone
Comments
Post a Comment