Fruit Craft: Egg Carton & Foam Ball Strawberry | Home Learning Art & Craft Activity
In this post, I will be sharing a "strawberry" craft. This was a craft project that Lauren did in Brightly Beaming Resources' (Step 3: Sound of the Week) home school curriculum for the "aw" sound as in "strawberry", Click Here To Find Out Why We Are Doing Homeschooling.
DISCLOSURE: This blog and post contains affiliate links. This means I may earn a commission should you chose to sign up for a program or make a purchase using my link. Thank you so much for your support!
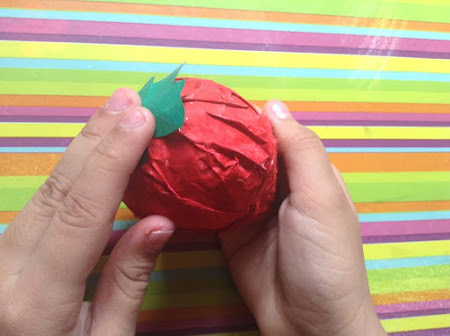
I thought about forming our strawberry by using an egg carton for the base then a foam ball is glued into it to form the whole fruit. A toothpick covered with green construction paper is inserted at the middle top of the foam ball to create the fruit stem.
READY FOR KID BEFORE STARTING ACTIVITY ALONG WITH OTHER MATERIALS
* cut egg carton(s)
* cut egg carton(s)
* glued foam ball in egg carton(s)
* cut leaf and calyx patterns
* toothpick(s) wrapped with construction paper
* hole punched construction papers
NOTE: This craft is a collaboration between parent or caregiver and child and is suitable for kids about 6 and above, you may adapt the process to the skill or ability of the child.
* STRAWBERRY FRUIT: Take an egg carton and trim the edges well. Also take a 2 inch styrofoam ball, this will be glued into the egg carton to form the whole strawberry fruit. We wrapped our balls with paper since we are using these foam which was a piece taken from a large styrofoam ball recycled from a previous craft project. If you are using newly bought foam balls there is no need to cover them up with paper.
* STRAWBERRY FRUIT: Take an egg carton and trim the edges well. Also take a 2 inch styrofoam ball, this will be glued into the egg carton to form the whole strawberry fruit. We wrapped our balls with paper since we are using these foam which was a piece taken from a large styrofoam ball recycled from a previous craft project. If you are using newly bought foam balls there is no need to cover them up with paper.
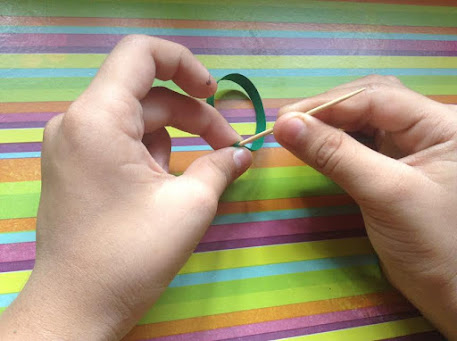
* STRAWBERRY STEM: Take a green construction paper and cut a thin strip from it or create a thin horizontal line on the construction paper using a ruler then cut the pattern which will be used to cover the toothpick stem.
* STRAWBERRY LEAVES: Draw a leaf pattern that resembles a strawberry leaf on a green construction paper.
* STRAWBERRY CALYX: Draw a calyx pattern on a green construction paper. The calyx pattern will be glued on top of the strawberry fruit before the stem will be inserted into it.
* STRAWBERRY DOTS: Take a construction paper in any color of choice (you can use any color aside from what is shown, eg: black, orange or brown) then punch the paper using a hole puncher. These small dots will be glued all over the fruit.
DONE BY CHILD
* glue foam ball into egg carton
* paint strawberry fruit
* create stem (wrap toothpick with green paper)
* cut calyx and leaf patterns
* add | draw details on leaves
* glue dots all over strawberry
STEPS IN DOING THIS STRAWBERRY CRAFT
STEP #1: Let child paint the strawberry then dry it under the heat of the sun or in front of an electric fan for a couple of minutes.
STEP #2: While waiting for the strawberry to dry, let child draw some details on the leaves using pencil then trace it with black pentel pen marker or coloring marker.
STEP #3: Once the strawberry is dry, let child glue the calyx pattern on top of the fruit.
STEP #4: Next, let child insert the toothpick stem on top of the calyx. You may use leaves simply as an accessory around finished strawberries or let child glue them on the stems.
STEP #5: Then, let child glue the small dots of hole punched papers all around the strawberry to create the dots all over it.
And there goes your "egg carton and foam ball strawberry", below are Lauren's finished strawberry project. Get the kids creating their own version of this strawberry craft today!
.
MATERIALS FOR THIS CRAFT
* egg cartons * about 2 inch styrofoam ball * liquid glue * toothpick * poster paint * paint mixing tray * paint brush * assorted construction papers * ruler (optional) * black pentel pen marker * coloring markers * scissors * hole puncher
LEARNING IS MORE FUN WITH A SONG!
Here is a nice strawberry song describing a strawberry fruit, how it taste, smell as well as all kinds of our favorite yummy food and desserts that are made out of it. Sing along to this fun song in the video below.
I'D LOVE TO HEAR FROM YOU!
If you got any thoughts and questions regarding this craft, feel free to interact and write it down in the comment box below. I'd be happy to hear from you. Thank you so much for viewing and reading.
POST UPDATED: April 2024
CREDITS: Real strawberry images by hartono subagio and ArtActiveArt from Pixabay
CREDITS: Real strawberry images by hartono subagio and ArtActiveArt from Pixabay
A little support goes a long way! If you’d like to help us keep creating, you can do so at https://ko-fi.com/kreativone


Comments
Post a Comment