Animal Craft: Zebra Out Of Disposable Plates + Links To FREE Resources!
In this post, I will be sharing a "zebra" craft. This was an art project that Lauren did in Brightly Beaming Resources' (Step2: Letter of the Week) homeschool curriculum for the "z" sound as in "zebra". I thought about doing a zebra craft using 2 large paper plates for the head and body. The look is inspired by a zebra clipart I saw.
DISCLOSURE: This blog and post contains affiliate links. This means I may earn a commission should you chose to sign up for a program or make a purchase using my link. It’s okay – I love all of these companies and you will too!
Once image is converted to "JPG" and saved to your computer, right-click on the image and select "print" in the pop up that comes out, next choose "9 x 13 cm" on the right corner of the printing settings then "print" the template on a bond paper. Cut and trace outer ear pattern on zebra pattern paper and the inner ear pattern on a gray or pink paper whichever color you prefer.
* Zebra Head & Body: Take 2 large disposable plate, trim the edges of one disposable plate to make it smaller. Trace the disposable plates on a printed zebra animal patterns. Cut the patterns.
Choose and download any zebra animal patterns you like from FREEPIK by clicking on the link below. Thumbnails without the gold crown icon are FREE to download. On your computer, right-click on the saved image and select "print" in the pop up that comes out. Choose "Full Page Photo" in the right corner of the printing settings, make sure the "fit to picture frame" is checked, type how many copies you want to print in the "copies of each picture" box then "print".
* Zebra Eye Balls: Click Here For Printable Circle Templates in various sizes. For the bigger outer eyeballs, print the "2 inch circles" on a bond paper and for the inner eye circles print the "1 inch circles" on a black construction paper. Let child cut circle patterns.
* Zebra Mouth: Click Here For Printable Oval Template, print the "6 inch oval template" on a black construction paper. Measure oval template below disposable plate head, trace from the back of the plate to create a guide for cutting. Let child cut pattern.
* Zebra Feet: Click Here For Printable Circle Template, print the "4 inch circles" on a black construction paper. Make a small cut at the bottom of these 2 circle patterns to create zebra hooves.
DONE BY CHILD
* cut strips of black and white paper for mane
* cut ear patterns
* cut eye ball patterns
* cut mouth pattern
* cut feet patterns
* glue zebra pieces together
STEPS IN DOING THIS ZEBRA CRAFT
STEP #1: Let child glue the zebra patterns on top of the disposable plates using solid glue stick.
STEP #2: Next, let child glue the smaller disposable plate on top of bigger disposable plate to create the zebra head and body.
STEP #4: Next, it's time to put together the zebra face and complete the zebra head. Let child glue the eyes and mouth on zebra face then the ears on head.
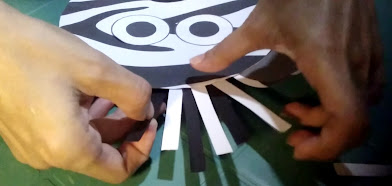
STEP #5: Next, let child add black and white strips of paper in between zebra ears to create the mane.
STEP #6: Finally, Let child glue zebra hooves below body to complete the zebra, you may cut a pattern on white paper to add as hoof details.
And there goes your "Disposable Plate Zebra". Below is the finished zebra using printable patterns and templates. Try creating your own zebra with the kids today!
MATERIALS FOR THIS CRAFT
Shop for materials used in this craft online @ shopee.ph by clicking on the materials highlighted in BOLD below.
* large disposable plates (cardboard type) * circle and oval templates * zebra animal print patterns * bond paper * assorted construction papers * scissors * hole puncher * solid glue stick
I'D LOVE TO HEAR FROM YOU!
If you got any reactions and thoughts regarding this craft or topic, feel free to interact and write it down in the comment box below. I'd be happy to hear from you. Thank you so much for viewing and reading.
POST UPDATED: September 2024


Comments
Post a Comment